Contributing with Code
What follows is a walk-through in getting VSCode setup for contributing to dbatools, and also includes various tips for utilizing the PowerShell Extension and Git features.
Install
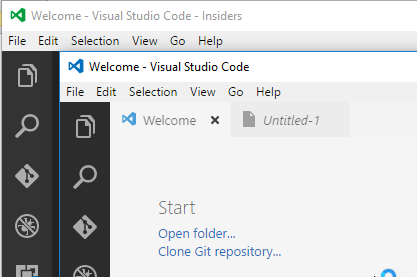
VSCode is a cross-platform tool that works on Windows, Linux and Mac. You can download your specific OS flavor here. Just note that I only use Windows, so if you are on another OS your mileage may vary. If you favor being a beta tester you can download the Insiders Edition from the same page. The VSCode team made some visual cues to easily indicate what edition you are using, as they can be used side-by-side:
You will also need to download and install Git. If you already have GitHub Desktop installed, you will still need to install Git.
Where To Start
Getting started with VSCode can be a bit challenging at first if you normally use something like the PowerShell ISE. Just like any new tool it requires a bit of time to acclimate yourself to it. The documentation for VSCode is laid out well and was a big help for me getting started. I would encourage you to spend time going through, at a minimum, the following sections:
- The Basics of Code (layout and how to move around)
- Code Extension Marketplace (how to expand what VSCode can do, will go over these in a bit)
- Version Control (Git integration)
- Integrated Terminal
- Accessibility
One additional resource that I think should be required reading, is the Tips and Tricks documentation on the VS Code site.
Command Palette
I want to bring special attention to this because almost everything you can do via a menu or button in VSCode, can also be done via the command palette. The nice part of the palette is it will provide help along the way as you type. To open the command palette you can use the keyboard with CTRL+SHIFT+P or access it via the View menu.
Any extension that has commands is going to show in the format of “extension name: command”, so typing “powershell” will show any command that comes with the extension (once you install it). You can do the same thing for Git, just type that in and all the commands that are supported show up. There are additional commands outside of the extensions that are provided with VSCode, that I tend to use a good bit. I’ve included the most common below, along with the keyboard shortcut (if they have one):
- Trim Trailing Whitespace (CTRL+K, CTRL+X)
- Change Language Mode (CTRL+K, M)
- Format Document (SHIFT+ALT+F)
- Change All Occurrences (CTRL+F2)
Quick Open
CTRL+P provides a quick open prompt. This will list any recent file you have opened, but you can also use it to find a file within your current session of VSCode. So if you have a folder open with multiple files, just hit CTRL+P and start typing the file name. If a match is found it will be selected, you can just hit enter to open it.
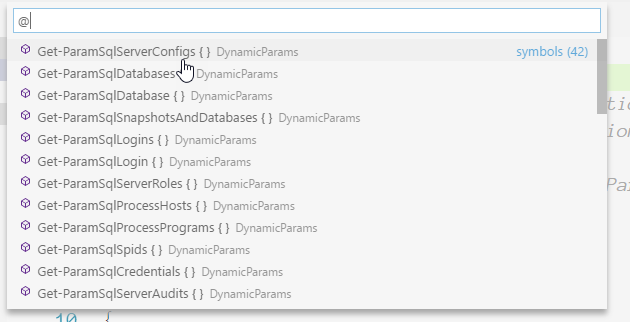
Another feature is if you open a PS1 file that may have multiple functions in it, hit CTRL+P and then type the at symbol ("@"):
Extensions
The single item below is the only extension you truly need to start developing PowerShell in VSCode:
This extension provides the meat and potatoes for PowerShell.
Non-Administrator
The installation for VSCode would require you to have Administrator privileges. If you find you need to work without Administrator rights to install extensions you can try the manual method. VSCode extensions are just VSIX files so you can download the file and manually add it in VSCode. You will find the latest VSIX file on the extension’s release page on GitHub. You can get to that repository by searching GitHub or from the “Resources” section on the marketplace page. The file for the PowerShell extension will be named something similar to “PowerShell-x.x.x.vsix”.
Once you download the file just follow the steps below:
- Open the command palette.
- Type in “ext install from vsix” and hit enter
- Browse to the VSIX file you downloaded
- You will then receive a prompt to reload VSCode.
Code’s Settings
VSCode you work with files or folders. Opening a folder is equivalent to a project in Visual Studio. One thing to understand is adjusting the settings in VSCode can apply to the “user settings” or “workspace settings”. User Settings overwrite VSCode’s default settings, and Workspace Settings can overwrite User Settings.

Workspace Settings
Workspace settings apply to a folder you open with VSCode. When you open a folder and first open workspace settings you will see a new folder is added, “.vscode”. Any Extension or settings in VSCode you manipulate within your workspace settings will be saved under “.vscode\settings.json”.
The following are settings recommended (as a baseline) for contributing with dbatools. Just paste the below into the workspace settings. You can access it via the command palette, just start typing “Preferences”, and you will see “Open workspace settings” in the list.
// Place your settings in this file to overwrite default and user settings.
{
    "files.encoding": "utf8",
    "powershell.scriptAnalysis.enable": true,
    "powershell.scriptAnalysis.settingsPath": "bin//PSScriptAnalyzerRules.psd1",
    "powershell.codeFormatting.newLineAfterOpenBrace": true,
    "powershell.codeFormatting.openBraceOnSameLine": true,
    "editor.formatOnPaste": true,
    "editor.formatOnType": true,

    //tab format
    "editor.tabCompletion": true,
    "editor.tabSize": 4,
    "editor.insertSpaces": false,
    "editor.detectIndentation": true
    // Windows 8.1 and below require you to specify PowerShell for the Integrated Terminal
    // If you are also on another OS you will need to specify the path to PowerShell.exe
    "terminal.integrated.shell.windows": "C://WINDOWS//sysnative//WindowsPowerShell//v1.0//powershell.exe"
}
Clone dbatools Repository
We first need to clone the repository before we can start contributing:
- Grab the “Clone with HTTPS” URL of your fork of dbatools.
- Open the command palette (CTRL + SHIFT + P)
- Type in “git clone” and press enter
- Paste the URL (CTRL + V) copied in step 1 into the prompt.
- Select the root folder where you want the repository to be kept (e.g C:\GitHub).
That is it! Once the repository is downloaded, VSCode will reload and open the dbatools folder. You can view the short recording to see the steps in action.
Add an Upstream
VSCode includes Git integration, which means you can use the command palette or the Git sidebar to perform Git commands within the same program. There are, however, some that are not supported at this time. In those cases you will need to revert to the command line or your tool of choice (e.g GitHub Desktop). If you favor the command line this is where the integrated terminal (CTRL+“backtick”) allows you to stay in VSCode.
When you fork dbatools to your GitHub account you will clone that repository, this is referred to as your “origin” remote. We just need to add another remote reference to the dbatools repository. This will make it a much smoother process to update your fork with the latest additions/modifications of dbatools.
Add Upstream Remote
The following command create a remote reference. You can name it whatever you want, but the standard term used with Git is “upstream”.
git remote add upstream https://github.com/dataplat/dbatools.git
After you run that command you can verify it was created as below:

Pull Down Updates
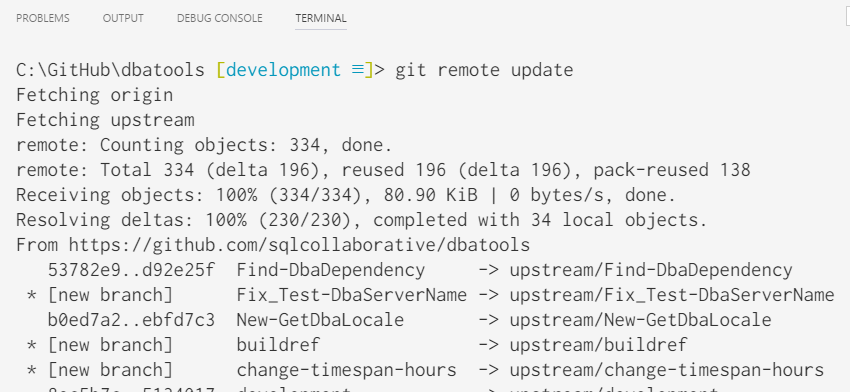
Once you have the remote that points to dbatools, you can use a few commands to pull down the changes. The following command updates all of the references to your remote repositories (origin and upstream).
git remote update
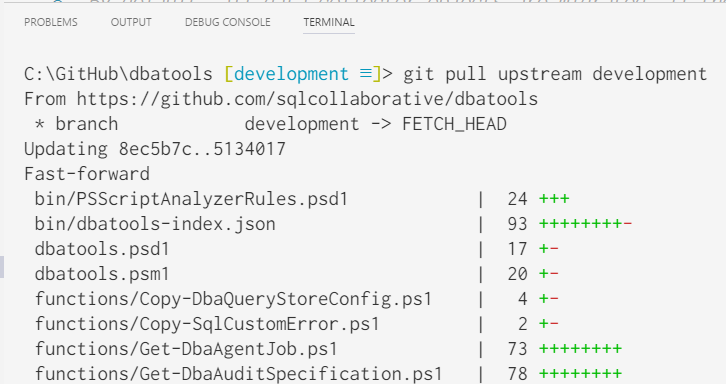
The development branch is the one all the changes to dbatools are initially committed to before making a release to master. You only really need to pull down the changes from this branch. The following command can be used for this purpose:
git pull upstream development
The status bar in VSCode will show an indicator if any changes were pulled down.

To show the breadth of VSCode with Git, there are 3 different ways you can “sync” your changes to your GitHub repository:
- Click on indicator in the status bar (the circle will start rotating)
- Open the command palette (CTRL+SHIFT+P), type “git sync” and hit enter.
- Open the Git sidebar, click on “…” at the top of the sidebar and click “sync”.
Branching Out
A branch is basically just a pointer to the current state of the current branch you have checked out. When you clone dbatools and open it in VSCode the first time should have the “development” branch checked out.

If you create a branch from development, you are basically making a copy of that branch in the current state. If you want to checkout a different branch, just click on that branch name from the status bar. This is going to open the command palette with the “git checkout” command entered, this also causes the branches found on your origin and upstream remotes to be listed. You can then select which one you want, or start typing the name to filter the list.
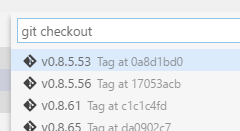
You can utilize the command palette to create a new branch as well, and is my preferred method. The following steps can be used:
- Open the command palette
- Type “git branch” and hit enter
- Provide your desired branch name and hit enter
After you hit enter you will see on the Git icon on the sidebar an icon shows it is working, once that goes away you will see the current branch change to your new branch.
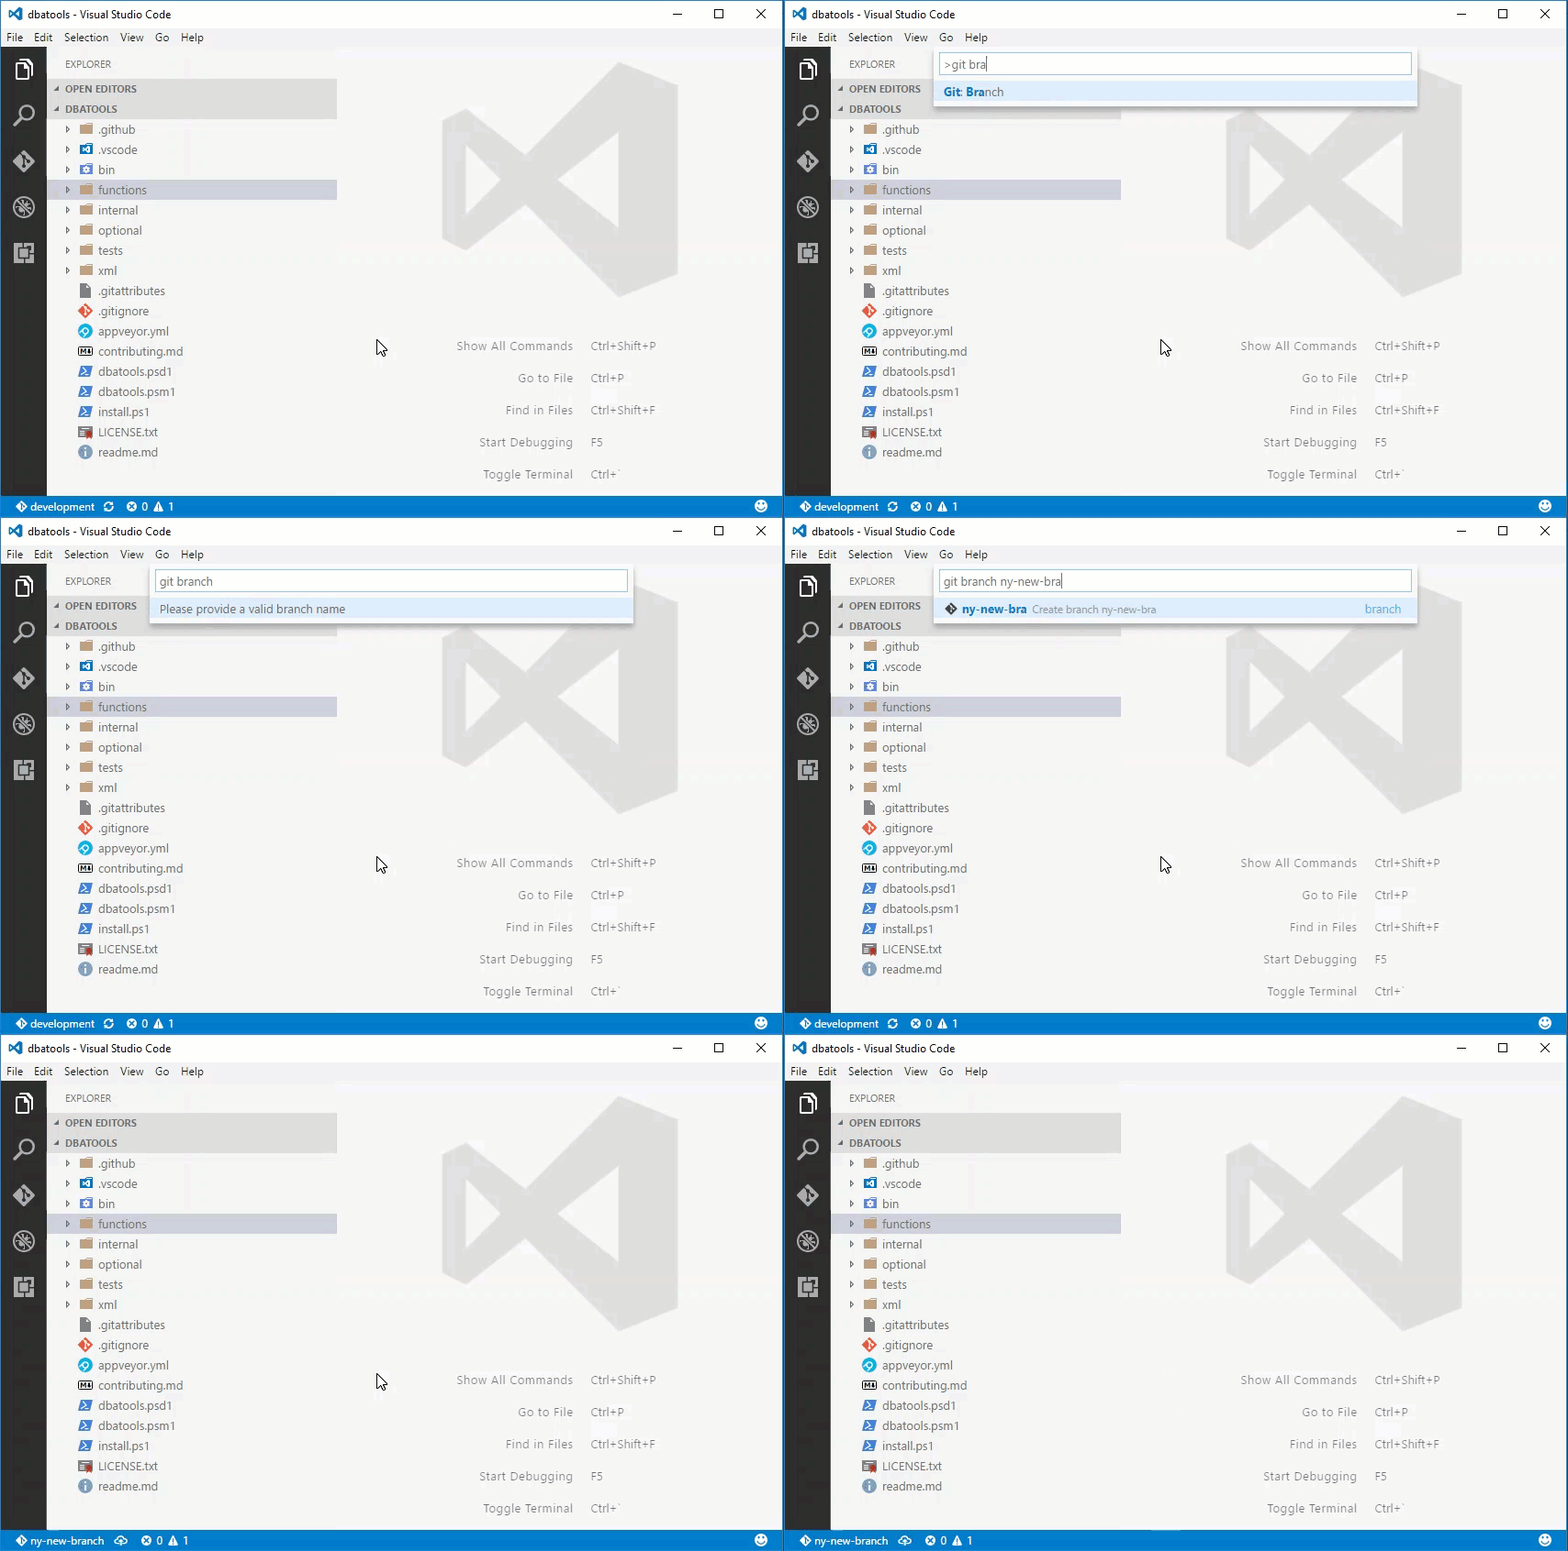
After you create the branch you can see another indicator you can click on to publish the branch. You have to publish it before you can start making commits.

When you click to publish the new branch, since we have multiple remotes, you will get a prompt to select which remote you want to publish the branch to, select “origin”.

Commit Often
It is often said “commit often” when you are using Git. It can help to make small changes, commit them, test them, and if something breaks roll-back that commit. VSCode offers you the basic ability of performing a commit but you can only roll back your last commit. So if you make a modification to a file you will see an indicator on the Git sidebar. Once you open that sidebar you can add your commit message and commit your change, all within VSCode.
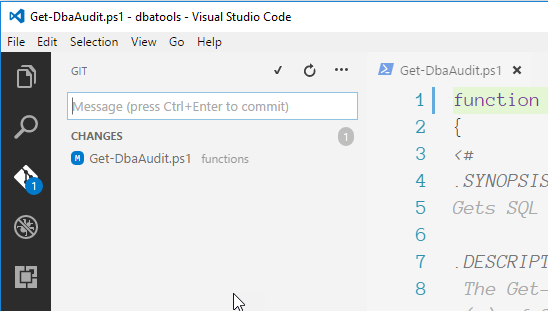
You can also right-click on any file listed in this sidebar to clean (remove any changes) and stage (make commits of only certain files at a time). If you open the file from the sidebar it will show you a comparison from your change and the original version of the file.
An Extra - Running PowerShell Code
If you are coming from the PowerShell ISE you may have gotten used to clicking the buttons on the toolbar to run either the whole script, or just the current line (or selected). In VSCode there are a few shortcomings in this area because there are no buttons. There are however key bindings/mappings that can be used.
Extensions - Keymaps
If you work with Atom or Sublime you can search the marketplace for “keymaps” and find a few extensions offered that will give you similar keybindings…note there is also one for Visual Studio.
Keybindings
By default the following keys are bound to the noted actions:
- F5 - Starts debugging the current file (has to be saved with the ps1 extension)
- F8 - Runs the currently focus (line or selected code).
There are a few caveats to the above keyboard bindings. The F8 keybinding runs the current line or selected code but outputs it to the Output pane and not the Integrated Terminal. If you go to your keyboard shortcuts, CTRL+K, CTRL+S and just paste the following to have it execute to the terminal:
// Place your key bindings in this file to overwrite the defaults
[
    {
        "key": "f8",
        "command": "workbench.action.terminal.runSelectedText",
        "when": "editorTextFocus && editorLangId == 'powershell'"
    }
]
So a short example, open a new file add one or two PowerShell commands. You will need to open the Integrated Terminal, so a PowerShell session is running, and then just place the cursor on a line and hit F8.
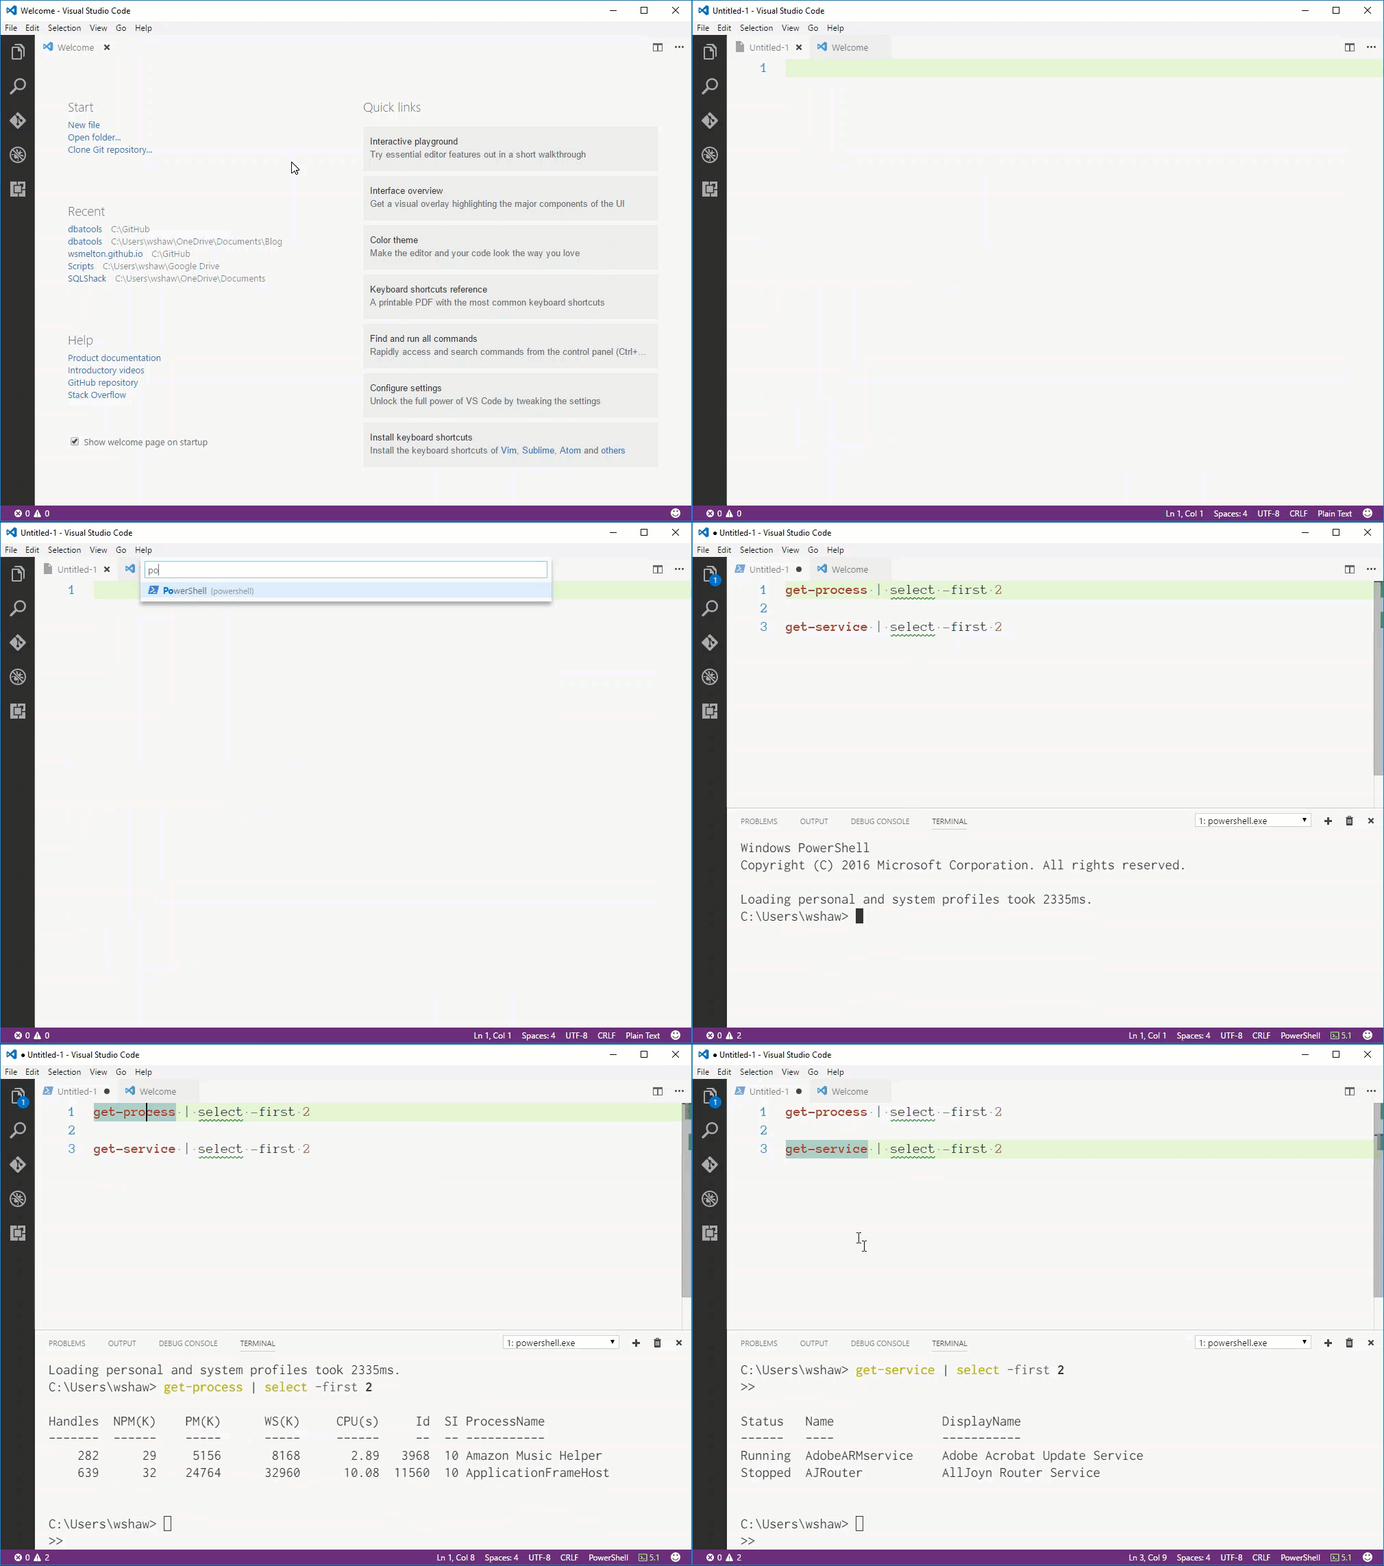
Now with F5 and debugging, it is up to you whether you want to change those around so they match up to what PowerShell ISE did. You would just need to find the command from the keyboard settings and add that to your keyboard settings.
An Extra-Extra - PSScriptAnalyzer
The PowerShell extension packages the PSScriptAnalyzer module which allows VSCode to check an open PS1 files against the PSSA rules. As the extension is released they bundle the latest version of the PSSA module. You can find what version is included by checking the following path on a Windows machine:
# "x.x.x" is current version of the extension you have installed
$env:USERPROFILE\.vscode\extensions\ms-vscode.PowerShell-x.x.x\modules
PSSA performs checks based on best coding practices and identifies the line of code that violates them. You can view these by using “CTRL+SHIFT+M” to open the “Problems” pane. You also have an indicator on the bottom left of the status bar of VSCode (clicking this will also open the “Problems” pane.

An added benefit as you open additional files, the problems pane will start grouping the problems by the file they are found in:
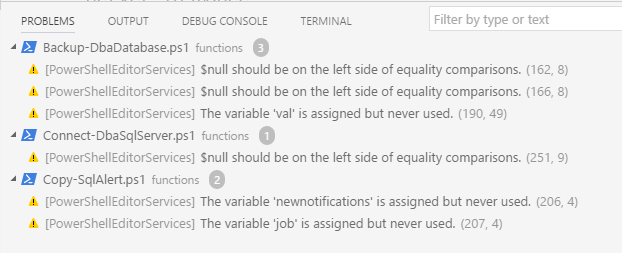
Just click on one of the problems and VSCode will jump to that file and line.
Summary
While this post is a bit long it by no means covers all the features in VSCode. Read through the documentation to find out more that can be done. You can also search on YouTube for some good videos that show using code in various ways, generally with other languages. Happy contributing!
 dbatools